About This Jack Skellington Amigurumi Pattern
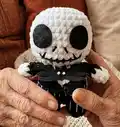
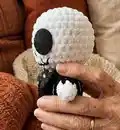
This pattern creates a small Jack Skellington amigurumi inspired by Nightmare Before Christmas. You will crochet the head, body, arms, and decorative jacket pieces, then assemble them into the finished doll. Clear round-by-round instructions and photos help you manage color changes and shaping.

The pattern uses chenille yarn for a plush finish and cotton/acrylic for suit details. It is ideal for makers who enjoy character toys and detail work.
Why You'll Love This Jack Skellington Amigurumi Pattern
I absolutely love this pattern because it brings a beloved character to life with simple but effective shaping and contrast. I enjoy the playful mix of plush chenille and tidy cotton stripes that give Jack his signature look. The project is satisfying to sew together and offers a lot of room for personalization. Every time I finish one, I find new little details to tweak and improve.
Switch Things Up
I love experimenting with yarn types for different finishes; try substituting chenille with plush acrylic for a softer, fuzzier doll or use standard worsted yarn for a firmer amigurumi.
I often change the size by altering hook and yarn weight: a larger hook and bulky yarn give you a chunky version, while smaller yarn and hook make a tiny keychain-sized Jack.
I like adding personality by slightly changing eye size or placement; move the felt circles a bit higher or lower to make the face more playful or mysterious.
Try embroidering different mouth expressions or stitching small scars for a unique character—black embroidery floss works well for crisp lines.
For an articulated look, consider inserting bendable wire into the arms before stuffing to make poseable limbs.
If you want a decorative ornament, reduce stuffing and insert a ribbon loop at the top of the head for hanging on a tree or wall.
Customize the suit by adding colored stripes, tiny buttons, or embroidered patterns to match your favorite version of the character.
I sometimes sew a small pocket inside the jacket to hide a tiny trinket or bell—this adds a sweet surprise for gift versions.
Switch the bow tie material: felt gives a classic look, but crocheting a tiny bow or using ribbon can give a more refined finish.
If you want to make a set, change colors to create themed variations—pastels for a cute take, or metallic yarn for a glam holiday version.
Common Mistakes & How to Fix Them
✗ Skipping stitch markers during rounds with increases or decreases can cause missed stitches; place a marker at the start of each round to keep consistent counts.
✗ Not stuffing the head and body evenly results in lumps and a distorted silhouette; stuff gradually and add small amounts of fiberfill as you shape.
✗ Changing color without securing ends neatly creates loose joins; weave in ends or carry the yarn securely and trim excess to prevent unraveling.
✗ Ignoring tension differences between chenille and cotton yarns leads to uneven stripes; try to match tension and check gauge frequently when switching yarns.
✗ Sewing pieces without pinning can result in misaligned limbs or features; pin parts in place first and check symmetry before stitching permanently.