About This FNAF Bonnie Amigurumi Pattern
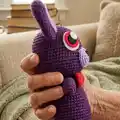
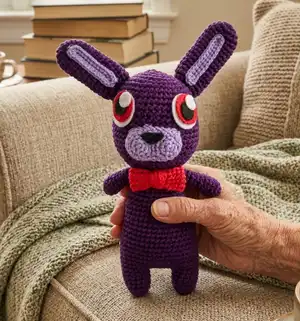
This pattern creates a stylized Bonnie-inspired purple bunny amigurumi with big anime-style eyes, a textured snout, long ears and a removable bow tie. The design uses single crochet shaping and small pieces sewn together for a clean finish. The pattern includes felt eye templates and clear assembly tips to help you create clean facial details.
Intermediate-level instructions guide you through shaping the head, body, legs, arms and ears. Step-by-step rounds and placement tips help ensure even shaping and proper piece alignment.
Why You'll Love This FNAF Bonnie Amigurumi Pattern
I absolutely love this pattern because it combines simple shaping with characterful details like the snout and bow tie that bring personality to the finished amigurumi. I enjoy the balance of repetitive rounds and small shaping sections which make it satisfying and relaxing to work. The felt eye templates and eye tutorial complement the crochet instructions and allow for expressive faces without complicated embroidery. It�s a fun project that makes a great gift or display piece, and I love seeing how makers customize colors and eye styles.
Switch Things Up
I love experimenting with colors on this pattern; try soft pastels for a cute, sleepy Bonnie or neon shades for a bold look.
I sometimes swap the cotton yarn for a plush or velvet yarn to make a softer, cuddlier version that feels super snuggly.
To make a mini keychain version I use thinner yarn and a smaller hook, and reduce stuffing for a flatter, portable friend.
I like adding embroidered freckles or stitched eyebrows to change the character�s expression and personality with minimal effort.
For different eyes, you can embroider or use safety eyes instead of felt, or try plastic dome eyes for a glossy finish.
I occasionally create outfits for my amigurumi; a tiny scarf or hat can completely change the finished look and makes a sweet gift set.
Adding a small wire inside the ears or limbs gives poseable features, but be sure to use proper crafting wire and secure the ends safely inside the stuffing.
If you want a sturdier toy, add a layer of backing felt behind the eyes before sewing to prevent stretch over time, especially with heavier yarns.
I also customize the bow tie by crocheting a larger rectangle or adding stripes to match holidays or themed decor for seasonal variations.
Don�t be afraid to mix yarn types: cotton gives structure while acrylic or plush yarns add softness, and combining them can yield a unique texture you�ll love.
Common Mistakes & How to Fix Them
✗ Placing safety eyes too high or too low can change the expression dramatically; mark eye placement on the head and measure between rounds 13-14 to keep them about two inches apart before attaching.
✗ Not stuffing as you go makes shaping difficult and can leave lumps; stuff gradually and evenly during the rounds mentioned, especially when closing the head and stuffing legs.
✗ Skipping stitch markers when joining legs to the body leads to lost stitch counts; place a stitch marker in the first stitch after joining the left leg to keep track of your rounds.
✗ Using an oversized hook or loose tension results in stuffing showing through; use tighter stitches and the recommended hook size or go down a hook to avoid gaps.
✗ Cutting felt pieces too small or gluing them in the wrong order affects eye appearance; follow the felt sizing diagram exactly and layer felt pieces before permanently attaching to ensure the anime look.