🧶 Beautiful ✨ Detailed 💝 Adorable

Daisy Flower Crochet Pattern

Daisy Flower Crochet Pattern
4.3★ Rating
2-3 Hours Time Needed
3.5K Made This
✂️

Beginner Friendly Level

Perfect for those just starting their crochet journey, with clear instructions and simple techniques

⏱️

Bite-Sized Project

Finishes in 2-4 hours—perfect for an afternoon of creative relaxation.

🏡

Cozy Accent

A warm touch for your space that transforms ordinary corners into inviting nooks filled with handmade charm.

About This Daisy Flower Crochet Pattern

This pattern walks you through crocheting small daisies and carnations, including the yellow center, layered petals, and a small green backing. You will use basic stitches—magic ring, single crochet, double crochet—and simple shaping to create floral elements. The tutorial includes step-by-step photos and diagrams to make the process easy to follow.

Daisy Flower Crochet Pattern crochet pattern - detailed view of completed project

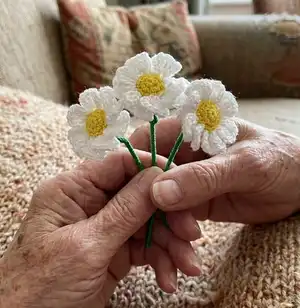
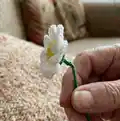
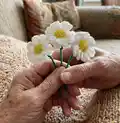
Finished flowers are glued to a stem and completed with a sepal and leaf for a realistic bouquet. Ideal for home decor, gifts, or a delicate handmade bouquet.

Why You'll Love This Daisy Flower Crochet Pattern

I absolutely love this pattern because it makes creating delicate crochet flowers quick and rewarding. I enjoy how each small motif becomes a charming bloom that can be assembled into a bouquet or used individually. The step-by-step photos helped me refine my technique and make consistent petals and centers. I also love that the same basic elements can be adapted to make different flowers like daisies and carnations.

Daisy Flower Crochet Pattern step 1 - construction progress Daisy Flower Crochet Pattern step 2 - assembly progress Daisy Flower Crochet Pattern step 3 - details and accessories Daisy Flower Crochet Pattern step 4 - final assembly and finishing

Switch Things Up

I love how simple it is to customize these flowers by changing color—try pastel shades for a soft bouquet or bright saturated hues for cheerful accents.

You can make the flowers larger or smaller by swapping thread weight and hook: thicker yarn with a larger hook makes chunky blooms; thinner thread makes tiny, delicate flowers.

I often mix colors in the petals and center for a two-tone effect—experiment with a contrast center and lighter petals for a vintage look.

Try adding beads or small buttons to the center instead of crocheting the tiny button for a different focal point and texture.

If you want a posable flower, use floral wire inside the wrapped stem to bend stems and arrange bouquets exactly how you like.

Use fabric stiffener or a bit of diluted glue to set petals in a semi-rigid shape if you prefer more sculpted flowers.

Make leaves in different sizes and shapes to vary the bouquet and give a natural look—longer leaves give a more wildflower vibe.

For a hanging garland, string several flowers on a cord, staggering heights for a lovely decorative piece.

I sometimes add a small ribbon bow around the finished stems to dress the bouquet as a gift.

Don’t be afraid to combine daisy and carnation styles from this pattern to create custom mixed bouquets—the same assembly steps apply.

Common Mistakes & How to Fix Them

✗ Skipping the magic ring tightening results in a loose center; always pull the magic ring tight and secure with a slip stitch. ✗ Not counting stitches in the first round creates uneven rows; count and make sure you have the correct number of SC before proceeding. ✗ Forgetting to make the chain spaces between double crochets will flatten the petals; add the CH 1 spaces exactly where shown to form petal shape. ✗ Applying glue immediately before positioning parts can slip; put glue carefully and wait a moment to position then press until set. ✗ Using a too-large hook for thread makes petals floppy; use a small hook and consistent tension for neat, firm petals.

Daisy Flower Crochet Pattern

Create charming crochet daisies and carnations with clear step-by-step photo instructions and diagrams. This pattern guides you through the central disc, petals, backing, and simple assembly for bouquets. You will make delicate flowers that are perfect for bouquets, decorations, or gifts. The pattern is friendly and encourages creativity with color and finishing options.

Beginner Friendly 2-3 Hours

Materials Needed for Daisy Flower Crochet Pattern

— Main Fabric

  • 01
    Cotton crochet thread (size 10) - small amounts: Yellow (center) approx. 5-10g
  • 02
    Cotton crochet thread (size 10) - small amounts: White (petals) approx. 10-15g
  • 03
    Cotton crochet thread (size 10) - small amounts: Green (sepal, leaf, stem covering) approx. 10-15g
  • 04
    Cotton crochet thread (size 10) - small amounts: Purple (for carnation) approx. 10-15g
  • 05
    Covered floral stems or floral wire wrapped with green thread for stems - quantity as needed for bouquet (e.g., 5-32 stems)

— Tools Required

  • 01
    Crochet hook small size (1.5-2.5mm recommended for thread)
  • 02
    Scissors
  • 03
    Yarn needle for sewing and finishing
  • 04
    Craft glue (strong clear-drying glue or fabric glue)
  • 05
    Wrapped floral stems or floral wire for stems
  • 06
    Small round button or small glue-on backing for the flower center (optional)
  • 07
    Tweezers or small needle for assembling and pulling the round element into a bundle

Progress Tracker

0% Complete

— Daisy :

Row 1 :

CH 1, SC 16 in the magic ring

Row 1 :

tighten the magic ring, ST in the first SC

Row 2 :

CH 3 from the first SC

Row 2 :

+ CH 1

Row 2 :

DC 1 in the first SC

Row 2 :

CH 1

Row 2 :

DC 1 in the second SC

Row 2 :

CH 1

Row 2 :

DC 1, CH 1, DC 1 in the third SC

Row 2 :

repeat

Row 2 :

ST in the third chain

Row 3 :

CH 3

Row 3 :

ST in the third chain

— The central part of the daisy :

Row 1 :

CH 1, SC 8 in the magic ring

Row 1 :

tighten the magic ring, ST in the first SC

Row 2 :

CH 1, SC 2 in the first SC (SC 16)

Row 3 :

repeat, SC 2 in each SC (SC 8)

Row 3 :

ST in the first SC

Row :

skip the second SC, SC 1 in the third SC

Row :

skip the fourth SC, SC 1 in the fifth SC, repeat

Info :

get button

Info :

fasten and trim the edges of the yarn

Info :

apply glue to the back of the button

— Petals / Flower outer rounds :

Info :

Refer to the diagram for the petal rounds: petal rows use chains and double crochets separated by CH 1 spaces to form ruffled petals (see diagram)

— Central part of the flower (green backing) :

Row 1 :

CH 1, SC 8 in the magic ring

Row 1 :

tighten the magic ring, ST in the first SC

Row 2 :

CH 1, SC 2 in the first SC (SC 16)

Row 3 :

repeat SC 2 in each SC (SC 8)

Info :

fasten and trim the edges of the yarn

Info :

apply glue to the back of the button

— Carnation :

Row 1 :

CH 20

Row 1 :

tighten the magic ring, ST in the first SC

Info :

and make the next two rows in the same way as you did the daisy

Info :

with the help of a needle and yarn, pull the round element into a bundle (for the instructions I'll use the green color of the yarn in the needle, but actually use the same color as the carnation)

Row :

pull the yarn by two edges and tie a knot, fasten and trim the edges of the yarn

Info :

open the flower, apply glue inside and close, pressing with your fingers until the glue hardens

— Button / Backing assembly :

Info :

get button. fasten and trim the edges of the yarn. apply glue to the back of the button

Info :

glue the button in the center of the flower

Info :

all parts + glue, for a daisy, make the sepal the same color as the flower

— Assembly and finishing :

Step :

apply glue to the edge of the stem

Step :

put the stem into the hole and wait for hardening

Step :

put the sepal on the stem, apply glue to the sepal

Step :

and glue to the flower

Step :

for daisy, use a white sepal like the flower itself, because the green sepal can shine through the flower to the outside

Step :

apply glue to the narrower edge of the leaf and glue it to the stem

Step :

put the sepal on the stem, apply glue and glue it to the flower

Step :

put the sepal on the stem, apply glue and glue it to the flower (repeat for each flower)

Final :

fold all the flowers included in the bouquet, align the edges of the stems and wind a sufficient amount of yarn on the bundle, fasten the edges of the yarn with glue

Assembly Instructions

  • Glue the small button into the center of the flower, pressing until set to secure the flower's center.
  • Apply glue to the edge of the wrapped stem and insert the stem into the hole in the flower base; wait for the glue to harden before continuing.
  • Slide the sepal onto the stem and apply glue to the sepal's inner edge, then glue it to the flower to hide the stem and secure the joint.
  • Apply glue to the narrow edge of the leaf and attach it to the stem with the glue; position and press until secure.
  • For a bouquet: align the stems of all flowers, wind a sufficient amount of green yarn tightly around the bundle, and fasten the yarn edges with glue.

Important Notes

  • 💡Use a small hook and cotton thread for neat, firm petals and consistent shaping throughout the flower.
  • 💡Work with consistent tension and count stitches after each round to ensure even petals and centers.
  • 💡Allow glue to set before moving on to the next assembly step so parts remain securely in place.
  • 💡Pin parts in place or hold firmly while glue sets to ensure correct alignment of sepal, leaf, and stem.

This crochet flower pattern helps you make pretty daisies and carnations you can gather into a handmade bouquet. Each bloom is small, delicate, and beautiful — perfect for gift bouquets or home decor. Make a bunch in different colors and enjoy the charm of floral crochet! 🌼🌿

You ask,

we answer.

FAQs

What size will the finished piece be?

The finished daisy measures a few centimeters across (small thread flower) when using size 10 cotton thread and a small hook; size varies with yarn and hook.

Can I use different yarn weights for this pattern?

Yes, you can use different yarn weights, but this will affect final size; use an appropriate hook for your chosen yarn and expect larger or smaller flowers.

Do I need prior crochet experience for this pattern?

This pattern is beginner friendly, but you should be comfortable making a magic ring, single crochet, chain, and double crochet for best results.

How long does this project typically take to complete?

Making one flower usually takes between 2-3 hours including assembly, though time varies with experience and number of flowers in a bouquet.