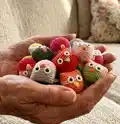
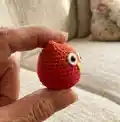
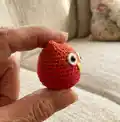
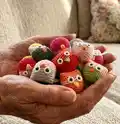
About This Crochet Owl Amigurumi Pattern
This pattern teaches you how to crochet a tiny owl using simple rounds and minimal shaping. It is a small amigurumi perfect for using scraps of Paintbox yarn in bright, playful color combinations. You will make the body and small white eyes, add safety eyes and a tiny beak to finish.
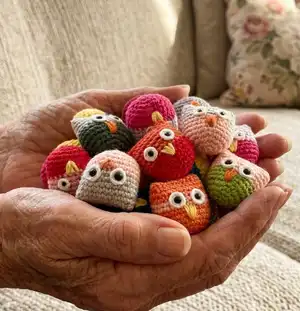
The instructions are written in US crochet terms and use basic stitches like single crochet and double crochet. This pattern is great for quick makes, gifts, or practicing amigurumi techniques.
Why You'll Love This Crochet Owl Amigurumi Pattern
I absolutely love this pattern because it turns simple yarn scraps into charming little characters that are quick to make. I enjoy how each owl becomes unique depending on the color choices, making them perfect small gifts or decorations. The shape is simple but expressive, so you can experiment with eye placement and beak colors to change personality. Making a few of these in an evening is so satisfying and a great way to build confidence with amigurumi.
Switch Things Up
I love how easy it is to customize this little owl with different colors and small details.
Try using pastel colors for a softer, nursery-friendly version of the owl.
Use bulky yarn and a larger hook to make a chunky, cuddle-sized owl instead of a tiny one.
I often replace safety eyes with embroidered eyes for a fully handmade, baby-safe toy.
You can change the beak shape and color to create many personalities, from long and pointy to short and rounded.
Add small crocheted wings or a belly patch to add texture and interest to your owl design.
Make a loop at the top to turn the owl into a hanging ornament or keychain charm.
I sometimes add a tiny scarf or hat for seasonal variations and holiday-themed owls.
Experiment with eyelid placement and stitch color around the eyes to create sleepy or surprised expressions.
Try combining felt pieces with crochet for layered eyes or beak details for faster finishing touches.
Common Mistakes & How to Fix Them
✗ Skipping the magic ring and starting with chains can create a loose center; use a tight magic ring to keep the bottom neat and closed.
✗ Not counting increases correctly during the first rounds leads to incorrect stitch counts; mark the start of your rounds with a stitch marker and count after each increase round.
✗ Forgetting to change colour at the indicated point will make the colour transition look off; change colour after round 8 as instructed and weave in the tail neatly.
✗ Adding too much stuffing before shaping the top can prevent proper ear shaping; stuff gradually and shape the top before closing to form nice ears.
✗ Pushing safety eyes through without checking placement can make the face look uneven; temporarily position the eyes and check spacing before fixing them permanently.