About This Crochet Bunny Pumpkin Amigurumi Pattern
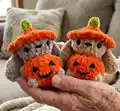
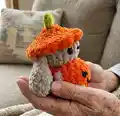
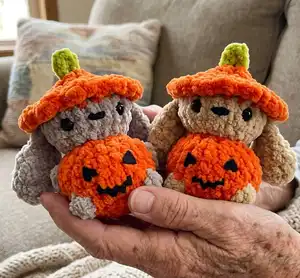
This pattern creates an irresistibly cute bunny whose body is crocheted in the shape of a pumpkin, complete with a hat and little pumpkin arms. It uses chenille yarn for a plush, velvety finish and simple shaping to achieve the rounded pumpkin look. The pattern includes color changes, bobble stitch accents, and finishing tips for facial details.
You will work in continuous rounds with back-loop/front-loop techniques and bobble stitches for texture. The instructions include where to place safety eyes, how to stuff, and finishing touches like a felt or embroidered face.
Why You'll Love This Crochet Bunny Pumpkin Amigurumi Pattern
I absolutely love this pattern because it combines playful character design with simple shaping techniques that yield a big personality. I enjoy how the pumpkin body feels plush and tactile with chenille yarn — it makes the toy irresistible to hug. The hat detail is creative and gives so much charm with only a few extra rounds. I also love that you can personalize the face using felt or embroidery to make each bunny unique. This pattern always makes me smile when I see the tiny pumpkins tucked into the bunny's arms.
Switch Things Up
I love trying different yarns for this pattern — swapping chenille for a boucle or plush acrylic changes the feel completely.
I often change the colors to make seasonal variations like pastel pumpkins or spooky black-orange versions.
To make a mini keychain version, I use a thinner yarn and a smaller hook for a tiny, portable pompom friend.
I sometimes embroider different facial expressions to give each bunny its own personality — a simple smile or a sleepy face works well.
For a more durable toy, I add a small backing of felt behind safety eyes and glue the pumpkin face pieces for extra hold.
I like to experiment with the hat size: adding a few extra rounds creates a floppy hat or reducing rounds makes it snug.
Try adding wire to the limbs for posability if you want the bunny to hold the pumpkin in different ways.
I enjoy making matching sets by changing only yarn colors and stitching alternate pumpkin faces for variety.
Consider crocheting a tiny scarf or bow to accessorize the bunny and add character to each finished piece.
When gifting, I package them with a small tag that lists yarn and hook size — readers appreciate the extra touch and customization ideas.
Common Mistakes & How to Fix Them
✗ Skipping the instruction to stretch your work during shaping can flatten the pumpkin; gently stretch the piece to the sides as directed to make it rounder.
✗ Forgetting to change to Color B at the correct round will break the color pattern; follow the color change notes exactly and switch where indicated.
✗ Placing safety eyes incorrectly will alter expression and symmetry; position safety eyes between R13-R14, four single crochets apart, before continuing to close.
✗ Not stuffing gradually will create lumps or collapse; stuff a little at a time while shaping and squish to make it chubbier as instructed.
✗ Failing to sew the ears under the hat securely can make them floppy; leave a long tail when fastening off and sew the ears under the hat firmly in the position you like.
✗ Working bobble stitches too loosely will make them indistinct; keep consistent tension and follow the BO instructions for textured details.