🧶 Beautiful ✨ Detailed 💝 Adorable

Cowboy Cat Hat Pattern

Cowboy Cat Hat Pattern
4.1★ Rating
2-3 Hours Time Needed
3.8K Made This
✂️

Intermediate Level

Ideal for those with basic crochet experience, featuring slightly more advanced stitches and techniques to expand your skills.

⏱️

Bite-Sized Project

Finishes in 2-4 hours—perfect for an afternoon of creative relaxation.

🧣

Snug Essential

Everyday comfort with practical charm, designed for both functionality and style through changing seasons.

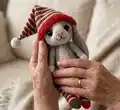
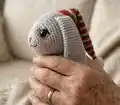
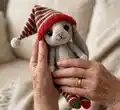
About This Cowboy Cat Hat Pattern

This pattern creates a miniature cowboy hat designed to fit adult cats (approx. 7-15 lbs) and small toy dog breeds. It features a top-down construction, built-in ear holes, an optional chin strap, and a separate decorative band. The pattern uses both bulky (#5) and worsted (#4) yarns so you can easily change scale and texture.

Cowboy Cat Hat Pattern crochet pattern - detailed view of completed project

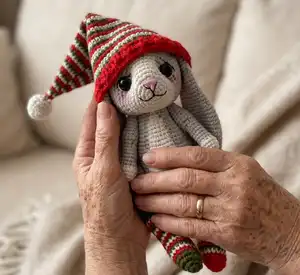
Worked in the round with simple increases and a few finishing steps, the hat is quick to make and customizable. Instructions include resizing guidance and clear notes to help you shape the brim and create the cowboy indent.

Why You'll Love This Cowboy Cat Hat Pattern

I absolutely love this pattern because it turns a small crochet project into an instantly charming accessory for pets. I appreciate how quickly the hat comes together while still offering shaping that gives it a real cowboy feel. The ear holes and optional chin straps make it practical as well as adorable, so pets (and owners) can enjoy wearing it. I also love that it adapts easily — swapping yarn weight or hook size changes the scale for kittens or plush toys.

Cowboy Cat Hat Pattern step 1 - construction progress Cowboy Cat Hat Pattern step 2 - assembly progress Cowboy Cat Hat Pattern step 3 - details and accessories Cowboy Cat Hat Pattern step 4 - final assembly and finishing

Switch Things Up

I love experimenting with colors and yarn textures for this hat; swapping the bulky yarn for a chunky boucle makes a fluffy, whimsical look.

I sometimes use a contrasting color for the band to make the hat pop — try bright reds, pastels, or metallic yarn for festive touches.

If you want a smaller hat for kittens or tiny toys, I change to a 3.5mm/E-4 hook and use worsted weight yarn; it scales down beautifully.

For a sturdier brim, I double up a strand of lighter yarn or add a thin plastic brim insert between rounds before sewing the band on.

I like to add tiny embroidered details or a small crocheted star or badge to the band for a sheriff look.

Try trimming the brim with a decorative surface slip stitch or picot edge to give the hat a finished, custom look.

If you prefer a posable look, I sometimes add a small length of wire inside the brim edge so it can be shaped and reshaped.

To make a holiday version, choose seasonal colors and tiny embellishments like felt holly, felt pumpkin, or a tiny crochet heart.

I also experiment with yarn weights to make plush toy-sized hats — a fingering weight yarn with a smaller hook produces a delicate doll hat.

Finally, I recommend testing placement of the chin strap before fastening off; I usually tie a temporary strand to see how it fits before finishing permanently.

Common Mistakes & How to Fix Them

✗ Skipping the continuous round method early on can create mismatched stitch placement; work without slip-stitch joins until Round 9 as directed to maintain correct shaping. ✗ Using the wrong hook size will alter the finished measurements and ruin the fit; use a 4.5mm/7 hook for the shown size or a 3.5mm/E-4 to scale down for smaller pets. ✗ Failing to count stitches after every increase round leads to uneven hat tops and ear hole placement; always verify stitch counts shown in [brackets] after each round. ✗ Not creating the ear holes exactly as instructed will cause the brim and ear openings to be off-centre; follow Round 9 verbatim including chain spaces and skips to form proper ear holes. ✗ Overstuffing or forcing the hat shape when finishing can distort the crown; gently push in the top about .5" and pinch the sides, or sew the sides permanently as an alternative.

Cowboy Cat Hat Pattern

Make a charming cowboy hat for your cat or small dog with this easy-to-follow crochet pattern. You'll enjoy the quick, creative process and the adorable result — a 3.5" tall hat with ear holes and an optional chin strap. The pattern uses simple shaping and works from the top down, so you can customize size and color as you like. Perfect for gifting or photoshoots, this hat brings personality and playful style to your pet's wardrobe.

Intermediate 2-3 Hours

Materials Needed for Cowboy Cat Hat Pattern

— Main Fabric

  • 01
    Bulky / 5 weight yarn (Red Heart Saver Chunky or similar) Brown (20g / .75oz, 34m / 38yd)
  • 02
    Worsted / 4 weight yarn (Red Heart Super Saver or similar) Tan (>1g / .1oz, >2m / yd) - used for the band and accent

— Tools Required

  • 01
    4.5mm / 7 crochet hook (or as needed to obtain gauge)
  • 02
    3.5mm / E-4 crochet hook (optional, to scale down for kittens or smaller pets)
  • 03
    Yarn needle for finishing

Progress Tracker

0% Complete

— Details :

Info :

Sizing: These hats are designed to fit adult cats (approx. 7-15lbs) and toy / miniature dog breeds. The finished hat measures about 3.5" tall with a 12" circumference, 2.5" forehead allowance, and 2.5" ear holes. To easily scale down this pattern for kittens/smaller pets, follow the pattern as written but substituting a 3.5mm / E-4 hook and Worsted / 4 / Medium weight yarn.

Info :

Skill Level: Intermediate (variety of stitches, mid level shaping)

Infos :

Materials: Bulky / 5 weight yarn (Red Heart Saver Chunky or similar) Brown (20gr/.75oz, 34m/38yd). Worsted / 4 weight yarn (Red Heart Super Saver or similar) Tan (>1gr/.1oz, >2m/yd). 4.5mm / 7 crochet hook or as needed to obtain gauge (see below). Yarn needle for finishing.

Info :

Gauge: 12 dc x 5 rows = 4" (10cm) square

Info :

Stitch Key (US terms): ch - chain. dc - double crochet. hdc - half double crochet. sc - single crochet. sk - skip. sp - space. ss - slip stitch. st - stitch.

Info :

Special Stitches & Techniques: Dc in the ch sp (Round 9): indicates the dc stitches are made around (not in) the chs from the previous round.

Infos :

Notes: The hat is worked in the round, from the top down. Beginning chains do not count as stitches. Slip stitches at the end of each round are made in the top of the first dc from that round. Stitch counts are indicated after each round in [brackets], construction notes appear in (italic gray parenthesis). See Resources section at the end of the pattern for supporting images and video links.

Info :

Printing: To save on ink, print only page 2

— Hat :

Round 1 :

in brown form a magic ring, sc 8 in the magic ring [8]

Info :

-- Note: do not ss to join, you will work continuously in the round until Round 9 --

Round 2 :

sc 2 in each st all the way around [16]

Round 3 :

sc in each st all the way around [16]

Round 4 :

*(sc in the next 3 sts, sc 2 in the next st), repeat from * 3 more times [20]

Round 5 :

sc in each st all the way around [20]

Round 6 :

*(sc in the next 4 sts, sc 2 in the next st), repeat from * 3 more times [24]

Round 7 :

sc in each st all the way around, ss into the next st [24]

Round 8 :

repeat round 7, ss to join [24]

Round 9 :

(this round forms the ear holes) Ch 2 (does not count as stitch), Dc 2 in each of the next 6 sts, Ch 10, sk the next 6 sts, Dc 2 in each of the next 6 sts, Ch 10, sk the next 6 sts, ss to join [24]

Round 10 :

ch 1, * (sc in the first 3 sts, sc 2 in the next st), repeat from * 2 more times, Working around the ch 10 sp, (hdc 1, dc 10, hdc 1), *(sc in the first 3 sts, sc 2 in the next st), repeat from * 2 more times Working around the next ch 10 sp, (hdc 1, dc 10, hdc 1), ss to join. [54]

Round 11 :

turn, ch 1, sc in each st all the way around (creates a solid edge and helps the edges of the hat turn up like a cowboy hat). Ss to join and fasten off. [54]

— Band :

Band :

In tan, ch 35, ss to join. Place the band around the center of the hat and sew on the hat.

— Chin straps (2 - optional) :

Chin straps :

Attach your yarn to the underside of the hat around the center 2 dc stitches from Round 10 above (should be the 5th and 6th dc, located at the middle of the ear hole). Ch 25, fasten off. Repeat on the other side.

— Finishing :

Finishing :

Weave in any ends. Turn the sides of the hat (near the ear holes) upwards. Push the top of the hat in down slightly so that it is indented about .5" and pinch the sides together to create the "cowboy" look. Alternately, to make the indent permanent, turn the hat inside out, fold in half so the ear holes line up, and sew both sides together along Round 2. Turn right side out.

— Supplemental Photos :

Info :

Photo 1: Finished hat, alternate colors. Photo 2: Hat modeled, alternate color. Photo 3: Where to attach your yarn if working chin straps. Photo 4: Folding down and pinching shut the top of the hat.

Assembly Instructions

  • Place the tan band around the center of the hat and sew it securely in place so it sits evenly around the crown.
  • Attach the optional chin straps by fastening yarn to the underside of the hat at the center 2 dc stitches from Round 10 (the 5th and 6th dc in the ear hole center); ch 25 and fasten off, repeating on the opposite side.
  • Turn the hat sides near the ear holes upwards to form the brim and push the top of the hat down about .5" to create the cowboy indentation before pinching the sides together.
  • To make the indent permanent, turn the hat inside out, fold in half so the ear holes line up, and sew both sides together along Round 2, then turn the hat right side out.
  • Weave in all loose ends with a yarn needle and check that seams and the band are securely sewn to prevent slipping when the hat is worn.

Important Notes

  • 💡Work the hat in the round from the top down and do not slip stitch to join until directed in Round 8 so ear holes align properly.
  • 💡Beginning chains do not count as stitches; always follow the pattern instructions for counts and turns.
  • 💡Slip stitches at the end of each round are made in the top of the first dc from that round to create a neat join.
  • 💡Confirm the stitch count after each round using the numbers in [brackets] to avoid mistakes in shaping and ear hole placement.

This adorable Cowboy Cat Hat pattern makes a charming accessory for photos, gifts, or playful dress-up sessions. It combines easy shaping, ear hole openings, and an optional chin strap for a secure fit. Make one in classic brown or try bold colors for a playful twist. 🐾🎩

You ask,

we answer.

FAQs

What size will the finished piece be?

The finished hat measures about 3.5" tall with a 12" circumference, a 2.5" forehead allowance, and 2.5" ear holes when using the recommended yarn and hook.

Can I use different yarn weights for this pattern?

Yes — the pattern uses Bulky/#5 for the main hat and Worsted/#4 for the band; to scale down for kittens, substitute a 3.5mm/E-4 hook with Worsted/#4 yarn.

Do I need prior crochet experience for this pattern?

This pattern is rated Intermediate and assumes familiarity with single crochet, half double crochet, and double crochet, plus working in rounds and shaping.

How long does this project typically take to complete?

Most crocheters complete this project in about 2-3 hours, though the time may vary based on experience and any customizations.

How do I make the cowboy indent permanent?

Turn the hat inside out, fold it in half so the ear holes line up, sew both sides together along Round 2, and then turn the hat right side out for a permanent indent.