🧢 Beautiful ✨ Detailed πŸ’ Adorable

Basic Crochet Basket Pattern

Basic Crochet Basket Pattern
4.7β˜… Rating
2-3 Hours Time Needed
4.2K Made This
βœ‚οΈ

Beginner Friendly Level

Perfect for those just starting their crochet journey, with clear instructions and simple techniques

⏱️

Bite-Sized Project

Finishes in 2-4 hoursβ€”perfect for an afternoon of creative relaxation.

🏑

Cozy Accent

A warm touch for your space that transforms ordinary corners into inviting nooks filled with handmade charm.

About This Basic Crochet Basket Pattern

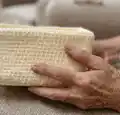
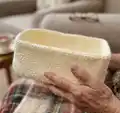
This pattern teaches you how to make a rectangular crochet basket using aran weight yarn and a large hook to create a dense, useful fabric. You will start by crocheting a flat base in half treble (htr) stitches, then work the sides in rounds with double crochet (dc) for structure. It is a practical, attractive project that stores beautifully and can be personalized by changing yarn color or size. The instructions are straightforward, making it a satisfying make for crafters of all levels.

Basic Crochet Basket Pattern crochet pattern - detailed view of completed project

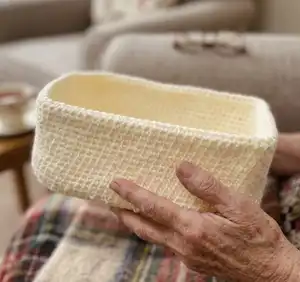
The finished basket measures approximately 30cm x 25cm x 14cm using the recommended yarn and hook. It makes a lovely storage solution or handmade gift and can be resized by adjusting the base chain or gauge.

Why You'll Love This Basic Crochet Basket Pattern

I absolutely love this pattern because it turns simple stitches into a highly useful home accessory that looks polished and professional. I enjoy how quickly the base grows using half trebles, then how the double crochet sides build up height and strength without complicated shaping. The basket is endlessly customizable β€” you can change yarn, color, or size to suit any space. It is also a satisfying evening project that finishes quickly and provides an immediate, practical reward.

Basic Crochet Basket Pattern step 1 - construction progress Basic Crochet Basket Pattern step 2 - assembly progress Basic Crochet Basket Pattern step 3 - details and accessories Basic Crochet Basket Pattern step 4 - final assembly and finishing

Switch Things Up

I like to experiment with different yarn colors to match my decor; using a contrasting rim color adds a nice detail.

I often change the yarn weight and hook size to make a smaller or larger version β€” a thicker yarn with the same stitch pattern makes a chunkier, sturdier basket.

I sometimes add a fabric liner sewn to the inside for a polished finish and to protect delicate items placed inside.

I also try color blocking by working the bottom half in one color and the top half in another for a modern look.

I have added handles by leaving gaps in the dc rounds and reinforcing the edges with extra rows of dc for carrying strength.

I like to experiment with stitch texture too; substituting htr base rows with hdc can produce a slightly different look if you prefer shorter stitches.

I occasionally embroider simple motifs on one side after finishing for a personalized touch or add a small crocheted flower as an accent.

I recommend blocking the base lightly if your yarn allows, to help it sit perfectly flat before working up the sides.

I also try making sets of baskets in graduated sizes by changing the base chain and number of base rows for nested storage solutions.

I sometimes add a thin strip of non-slip fabric glued to the bottom if I plan to place the basket on smooth surfaces to prevent sliding.

Common Mistakes & How to Fix Them

βœ— Skipping the correct chain count for the base will make the basket the wrong shape; always chain 31 and check your initial stitch count before continuing. βœ— Crocheting with inconsistent tension can cause wavy or lumpy sides; keep your tension even and practice a few rows to stabilize your gauge. βœ— Not turning at the end of base rows will distort the rectangular base; follow the instruction to turn after each row so the base lays flat. βœ— Failing to space the double crochets evenly along the short edges will cause uneven corners; count and distribute the 18 dc evenly along each short side. βœ— Fastening off too early or not leaving a long tail makes assembly difficult; leave a long thread to sew when fastening off the sides to secure them neatly.

Basic Crochet Basket Pattern

Create a sturdy, stylish storage solution with this Basic Crochet Basket pattern. You will work a flat base in half treble stitches, then build up the sides in rounds with double crochet for strong, even walls. The design is quick to make and easy to customize, perfect for organizing small items or gifting to a friend.

Beginner Friendly 2-3 Hours

Materials Needed for Basic Crochet Basket Pattern

β€” Main Fabric

  • 01
    Paintbox Simply Aran (aran weight) - 3 x 100g in Cream

β€” Tools Required

  • 01
    10mm hook
  • 02
    Tapestry needle

Progress Tracker

0% Complete

β€” Materials :

Infos :

3 x 100g Paintbox simply aran in cream. 10mm hook. Tapestry needle. Dc - double crochet. Htr - half treble.

β€” Size :

Info :

30cm x 25cm x 14cm Gauge: 10cm x 10cm = 10 htr and 7 rows.

β€” Base :

Base (P1) :

Chain 31, htr in 2nd chain from hook. Htr to end (30 sts). Turn. Htr in each stitch to the end. Turn. Repeat until base measures 25cm.

β€” Sides (working in rounds) :

Round 1 :

Working along 1st short side, dc 18 sts evenly along the edge, dc 30 along long edge, dc 18 sts evenly along 2nd short side, 30 dc along long edge. (96 dc)

Infos :

Continue working in rounds until sides measure 28cm or double the required height. Fasten off leaving a long thread to sew.

β€” Finishing :

Fold and Secure :

Fold sides in half and secure along the base where htr row and dc row meet.

Final Touch :

Shape and enjoy!

Assembly Instructions

  • Fasten off the sides leaving a long tail; use this long thread to sew the seam when assembling the basket.
  • Fold the sides in half so the dc and htr rows line up, creating neat corners and the desired rectangular height.
  • Secure the folded sides along the base where the htr row meets the dc row using a tapestry needle and the long tail.
  • Weave in any remaining ends neatly on the inside of the basket to maintain a clean exterior finish.
  • Shape the basket gently with your hands after sewing so the sides stand up evenly and the corners look tidy.

Important Notes

  • πŸ’‘Work the base flat in rows, turning at the end of each row, until the base measures 25cm for the correct dimensions.
  • πŸ’‘Distribute the dc stitches evenly along the short sides to ensure neat, square corners and an even stitch count of 96 dc.
  • πŸ’‘Leave a long yarn tail when fastening off the sides so you have enough length to sew the sides securely to the base.
  • πŸ’‘Use the recommended 10mm hook for the stated gauge; changing hook size will alter the finished dimensions significantly.

This Basic Crochet Basket pattern gives you a functional and attractive storage solution that you can make in an afternoon. It is versatile, customizable, and great for organizing small items around the home. Whether you keep it for yourself or give it as a handmade gift, it adds a cozy, handcrafted touch to any room. 🧢🏑

You ask,

we answer.

FAQs

What size will the finished piece be?

The finished basket measures approximately 30cm x 25cm x 14cm when using the recommended Paintbox Simply Aran yarn and a 10mm hook.

Can I change the size of the basket?

Yes, you can change the size by altering the base chain length for a wider or narrower basket and by working fewer or more rows for the base length; gauge and yarn weight will affect final dimensions.

What stitches are used in this pattern?

This pattern uses half treble (htr) for the base and double crochet (dc) for the sides, both of which create a sturdy fabric well suited for baskets.

Is this pattern suitable for beginners?

Yes, this pattern is beginner friendly and uses simple stitches and straight-forward construction, though familiarity with turning rows and working evenly along edges is helpful.

How long does this project typically take?

Most crocheters complete this basket in about 2-3 hours, depending on experience and how quickly you work.