🧶 Beautiful ✨ Detailed 💝 Adorable

Baby Fledermaus Amigurumi Pattern

Baby Fledermaus Amigurumi Pattern
4.8★ Rating
2-4 Hours Time Needed
4.1K Made This
✂️

Intermediate Level

Ideal for those with basic crochet experience, featuring slightly more advanced stitches and techniques to expand your skills.

⏱️

Bite-Sized Project

Finishes in 2-4 hours—perfect for an afternoon of creative relaxation.

🧸

Cute Companion

An adorable friend to cherish, handcrafted with love to bring comfort and joy for years to come.

About This Baby Fledermaus Amigurumi Pattern

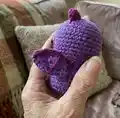
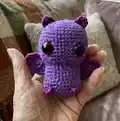
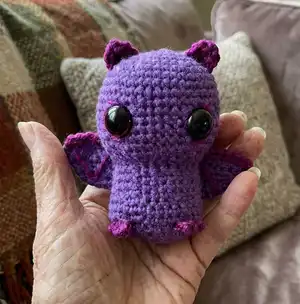
This pattern creates a small, adorable baby bat amigurumi worked in continuous rounds for head and body. It features simple wing panels crocheted in rows and small ears and feet worked separately. You will use two contrasting colors to highlight wing details and facial accents. Clear round-by-round instructions make shaping easy to follow.

Baby Fledermaus Amigurumi Pattern crochet pattern - detailed view of completed project

The finished toy is pocket-sized and quick to crochet, making it a great gift or seasonal decoration. Minimal sewing is required for assembly and finishing details.

Why You'll Love This Baby Fledermaus Amigurumi Pattern

I absolutely love this pattern because it turns simple stitches into a character full of charm and personality. I enjoy how quickly the little bat comes together, giving fast satisfaction without sacrificing cuteness. The design balances easy shaping with small details that let you personalize each bat. Sewing the wings and tiny ears is so rewarding — they instantly bring the toy to life. I also love that you can use bright or muted colors to change the whole mood of the finished piece.

Baby Fledermaus Amigurumi Pattern step 1 - construction progress Baby Fledermaus Amigurumi Pattern step 2 - assembly progress Baby Fledermaus Amigurumi Pattern step 3 - details and accessories Baby Fledermaus Amigurumi Pattern step 4 - final assembly and finishing

Switch Things Up

I love experimenting with color combinations on this bat; try soft pastels for a whimsical look or deep hues for a spooky Halloween vibe.

You can make the bat larger or smaller by changing yarn weight and hook size—bulky yarn produces a cuddly chunky bat while thin yarn makes a tiny keychain version.

I often add small accessories like a tiny crochet bow, scarf, or a little witch hat to personalize each bat.

For more texture, try using a boucle or fuzzy yarn for the body and a smooth cotton for the wings to make them stand out.

Embroider different eye shapes or add eyelids with felt to vary the bat's expression and give unique personalities.

Consider stitching contrasting triangles on the wings with a bright color to create a patterned effect, as suggested in the pattern with color B.

If you want posable wings, insert a thin craft wire into the wing seam before closing and cover it with sewing stitches to hide the wire.

I like to make small matching sets by changing only the eye size or yarn color to create families of bats in different sizes.

Try using safety eyes of different sizes or embroider eyes for a safer toy for very young children—just make sure to adjust placement as instructed.

For gifting, add a stitched loop at the top of the head to hang the bat as an ornament or keychain.

When sewing pieces on, use the long yarn tails left from each element to make invisible joins and weave ends into the body so nothing loosens with play.

Lastly, I recommend blocking the wings lightly (if using cotton) to flatten them before attaching for a neat, professional finish.

Common Mistakes & How to Fix Them

✗ Skipping the recommended stitch count during increases and decreases; count stitches after every round to keep the shape correct and avoid mismatched rows. ✗ Placing safety eyes too late or too close together causes an odd facial expression; insert safety eyes between Runde 12 und 13 with 9 Maschen Abstand as instructed for the intended look. ✗ Not stuffing evenly can make the head and body lumpy; stuff gradually and firmly where shaping is needed, adding small amounts at a time for smoother results. ✗ Cutting yarn ends too short makes sewing parts difficult; leave long ends for sewing pieces like wings and ears so you can secure them neatly. ✗ Using a different hook size without adjusting tension changes the finished size and fit of safety eyes; maintain the recommended 2.5 mm hook or adjust yarn choice and eye size accordingly.

Baby Fledermaus Amigurumi Pattern

Make a tiny, whimsical baby bat with this charming amigurumi pattern. You will enjoy clear step-by-step rounds and simple shaping to create a sweet pocket-sized companion. The design uses two contrast colors for cute details and minimal sewing for fast results. Perfect as a handmade gift or decorative accent for Halloween.

Intermediate 2-4 Hours

Materials Needed for Baby Fledermaus Amigurumi Pattern

— Main Fabric

  • 01
    Schachenmayr Catania (Nummer 2) in Farbe 0113 violet (A)
  • 02
    Schachenmayr Catania (Nummer 2) in Farbe 0282 phlox (B)
  • 03
    Füllung (polyester stuffing or similar)
  • 04
    Sicherheitsaugen 11 mm

— Tools Required

  • 01
    Crochet hook 2.5 mm
  • 02
    Yarn needle (Garnnadel) for sewing
  • 03
    Scissors
  • 04
    Embroidery needle (Sticknadel)
  • 05
    Safety eyes 11 mm (2 pieces)
  • 06
    Polyester stuffing

Progress Tracker

0% Complete

— Kopf :

Round 1 :

R1: 6 fM in den mR

Round 2 :

R2: 2 fM in jede M (12)

Round 3 :

R3: (1 fM, Zun) x6 (18)

Round 4 :

R4: (2 fM, Zun) x6 (24)

Round 5 :

R5: (3 fM, Zun) x6 (30)

Round 6 :

R6: (4 fM, Zun) x6 (36)

Round 7 :

R7: (5 fM, Zun) x6 (42)

Round 8-14 :

R8-14: 1 fM in jede M

Info :

Sicherheitsaugen zwischen Runde 12 und 13 mit 9 Maschen Abstand anbringen.

Round 15 :

R15: (5 fM, uns Abn) x6 (36)

Round 16 :

R16: (4 fM, uns Abn) x6 (30)

Round 17 :

R17: (3 fM, uns Abn) x6 (24)

Info :

Den Kopf fest füllen.

Round 18 :

R18: 1 fM in jedes vMg (24)

Round 19 :

R19: (3 fM, Zun) x6 (30)

Round 20-22 :

R20-22: 1 fM in jede M

Round 23 :

R23: (4 fM, Zun) x6 (36)

Round 24-25 :

R24-25: 1 fM in jede M

Round 26 :

R26: (4 fM, uns Abn) x6 (30)

Round 27 :

R27: (3 fM, uns Abn) x6 (24)

Round 28 :

R28: (2 fM, uns Abn) x6 (18)

Info :

Körper füllen.

Round 29 :

R29: (1 fM, uns Abn) x6 (12)

Round 30 :

R30: uns Abn x6 (6)

— Flügel :

Info :

mit A

Round 1 :

25 Lm, wenden

Round 2 :

R1: 1 fM in jede M, wenden (24)

Round 3 :

R2: uns Abn, 20 fM, uns Abn, wenden (22)

Round 4 :

R3: uns Abn, 18 fM, uns Abn, wenden (20)

Round 5 :

R4: uns Abn, 16 fM, uns Abn, wenden (18)

Round 6 :

R5: uns Abn, 14 fM, uns Abn, wenden (16)

Info :

Garn abschneiden, Garnende zum Nähen lassen. Den Faden im Flügel vernähen, so dass das Ende näher zur Mitte des Flügels herauskommt. Damit wir die Flügel später annähen können.

Info :

mit B

Info :

Garn an der ersten Reihe des Flügels anbringen. 24 fM entlang häkeln. Garn abschneiden und ein langes Ende lassen. Mit der Garnnadel Dreiecke auf den Flügel sticken.

— Ohren :

Ohren (x2) :

mit B 2 Lm, in die zweite Lm von der Nadel: hStb, Stb, hStb, fM. Garn abschneiden, langes Ende lassen.

— Füße :

Füße (x2) :

mit B 2 Lm in zweite Lm von der Nadel 4 fM häkeln. Garn abschneiden und Ende lassen.

Info :

Die Flügel, Ohren und Füße annähen. Die Augen umsticken.

Assembly Instructions

  • Place safety eyes between rounds 12 and 13 with 9 stitches between them before stuffing the head and secure the washers behind the fabric.
  • Sew the wings to the sides of the body using the yarn ends left from the wing pieces, positioning them symmetrically and securing with small whipstitches.
  • Attach the ears to the top of the head, spacing them evenly and sewing through the head rounds so they sit upright.
  • Sew the feet to the bottom edge of the body so the bat can sit upright; use the long yarn ends to stitch securely and weave in tails.
  • Embroider around the eyes (umsticken) with contrast yarn for the finished look and weave in all ends securely.

Important Notes

  • 💡Körper und Kopf werden in Runden an einem Stück gehäkelt; die Flügel werden separat in Reihen gearbeitet und angenäht.
  • 💡Ich empfehle die genannte Garnstärke sowie Baumwollgarn zu verwenden, um die richtige Form und Stabilität zu erhalten.
  • 💡Sicherheitsaugen können mit einem Feuerzeug erhitzt und flach gedrückt werden, um noch sicherer zu sein.
  • 💡Garnenden beim Abschneiden lang lassen, damit sie zum Annähen verwendet werden können.

Thank you for crocheting this Baby Fledermaus — a tiny friend with big personality! 🧶 This pocket-sized bat is perfect for Halloween gifts or a cute display on your shelf. 🧸 Enjoy stitching the little details and sharing your creation with friends and family. ✨

You ask,

we answer.

FAQs

What size will the finished piece be?

The finished amigurumi is a small, pocket-sized bat when using Schachenmayr Catania and a 2.5 mm hook; exact size depends on yarn and tension.

Can I use different yarn weights for this pattern?

Yes, you can change yarn weight, but it will affect the final size; adjust your hook size accordingly and choose appropriate-sized safety eyes.

Do I need prior crochet experience for this pattern?

This pattern is rated intermediate, so basic knowledge of stitches and shaping (increases, invisible decreases) is recommended.

How long does this project typically take to complete?

Most crocheters complete this bat in 2-4 hours, depending on experience and how many details (embroidery, wing stitching) you add.